- Remove the blue cover.
Guide: https://knowledgebase.agrispraydrones.com/j150-replacing-/-installing-the-top/front-radar - Remove both GNSS/RTK antennas and unplug them from the CPU.
- Unplug the starboard-side connections from the old CPU and plug them into the new CPU.
- Remove the 6 screws holding the CPU. Note the position of the pink dense foam pad and place it in the same position on the new CPU. Screw the new CPU down.
- Transfer the remaining connections to the new CPU. Plug in the GNSS/RTK antennas and screw them down.
- Pair the controller to the new CPU. Guide: https://knowledgebase.agrispraydrones.com/j150-pairing-rc-to-the-drone
- Update the serial number if needed. Guide: https://knowledgebase.agrispraydrones.com/j150-changing-serial-number-country-for-cpu
- Update the CPU firmware. Guide: https://knowledgebase.agrispraydrones.com/j150-firmware-update-6/24/2026-0
- Test-fly in a safe, open location to confirm the drone is working correctly.
AE Vision J150 CPU Swap Instructions
(Updated: Aug. 27, 2026, 9:47 a.m.)
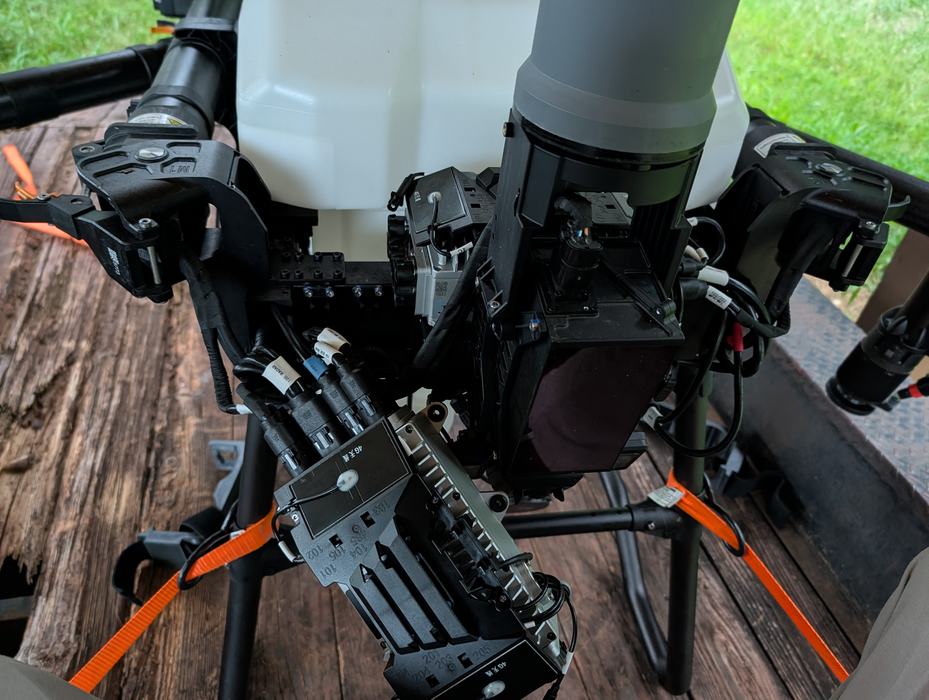
View showing step 3 of the process. The wires being moved from the old CPU to the new one.
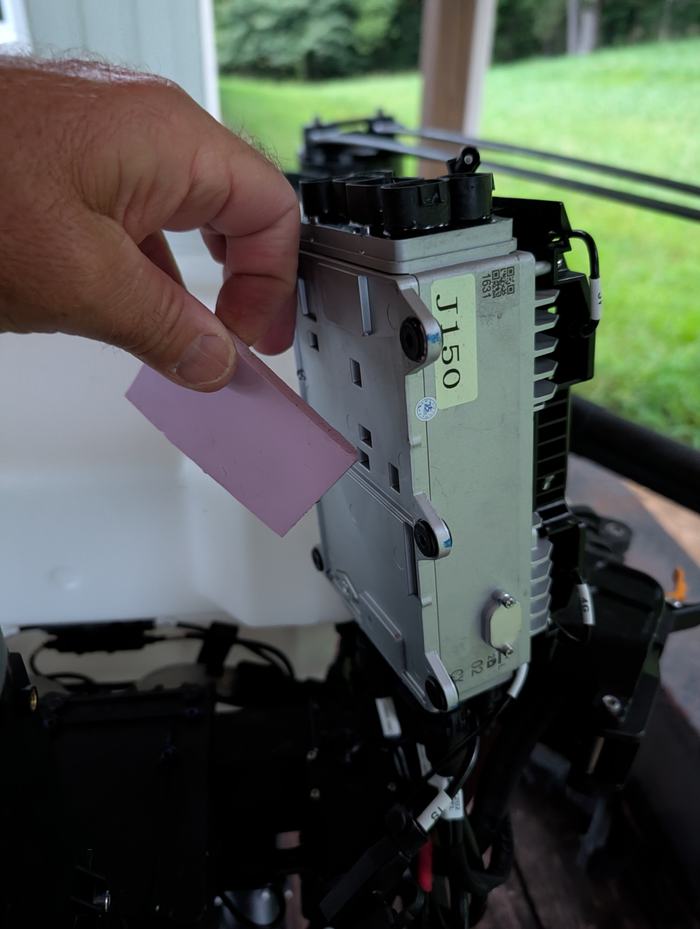
Moving the foam pad over in step 4.
Join our mailing list!
Enter your email address to receive updates.
Written By