Want to load your own orthomosaic images into the XAG One App? You've come to the right place to learn how! It's not hard, but there are a few steps involved. I've decided to break this down into three parts for clarity:
Part 1: We'll learn how to connect the XAG One App with public XYZ tile servers.
Part 2: I'll guide you through converting your orthomosaics into a tiled map. This step can often be integrated into the raw image processing phase.
Part 3: Finally, I'll show you how to connect your maps to the XAG One App. You may not have realized it, but XYZ tiled maps are very common. This format is used by Google Maps, Google Earth, and OpenStreetMap, just to name a few. It's an open standard format, and if you're interested, Wikipedia has a good explanation of how it works.
Now, let's dive in and get into Part 1, connecting the XAG One App to a public XYZ tile server!
Step 1: Reality Check
Before diving into custom data, let's confirm that the XAG One App can indeed handle custom maps by using publicly available tiled maps. This will verify the functionality of custom maps:
Step 2: Displaying Public Maps
-
Copy the Open Street Map URL.
-
Now, in the XAG One App navigate to the main Field screen and tap the "map type" icon (two overlapping squares, located below the notification bell).
-
From the Map Type window select Satellite Map, then Custom Map.
-
Paste the copied URL into the provided text field.
-
Often the URL will auto-format/correct what you paste. If you see this https://tile.openstreetmap.org/%7Bz%7D/%7Bx%7D/%7By%7D.png, manually correct it to https://tile.openstreetmap.org/{z}/{x}/{y}.png.
-
Restart the App. You should now see the Open Street Map as your base layer. If it doesn't work, recheck the steps above.
Visual Steps
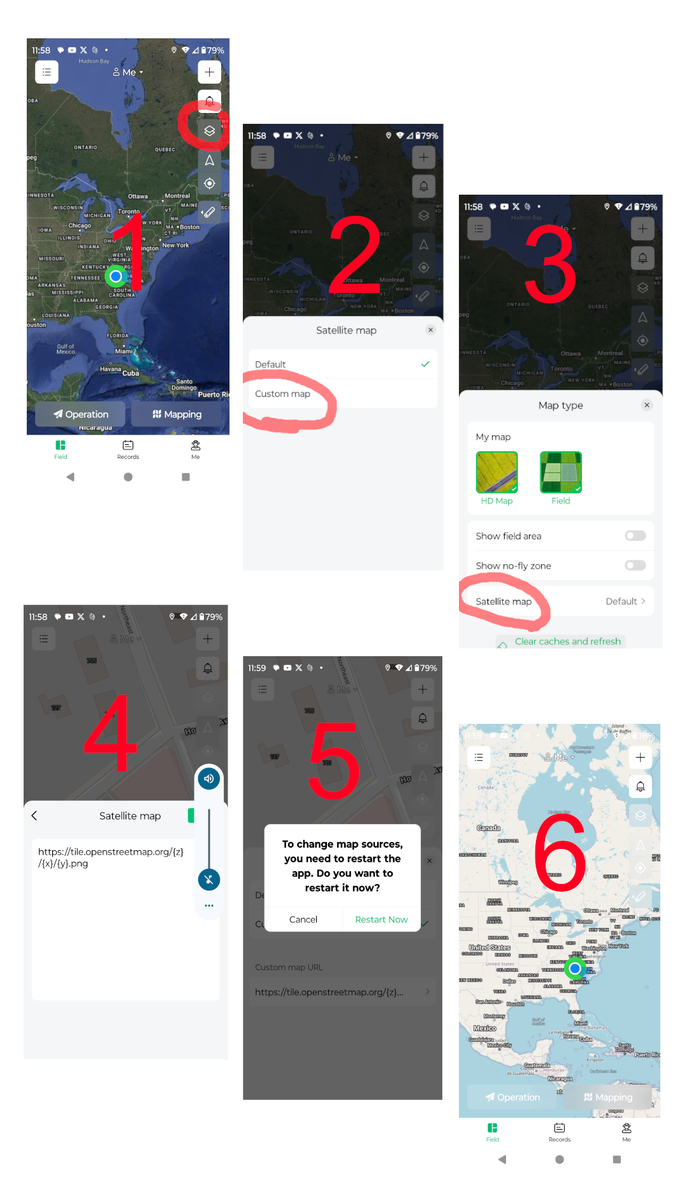
Since these directions can get a bit convoluted, I've attached screenshots to illustrate these steps outlined above.
